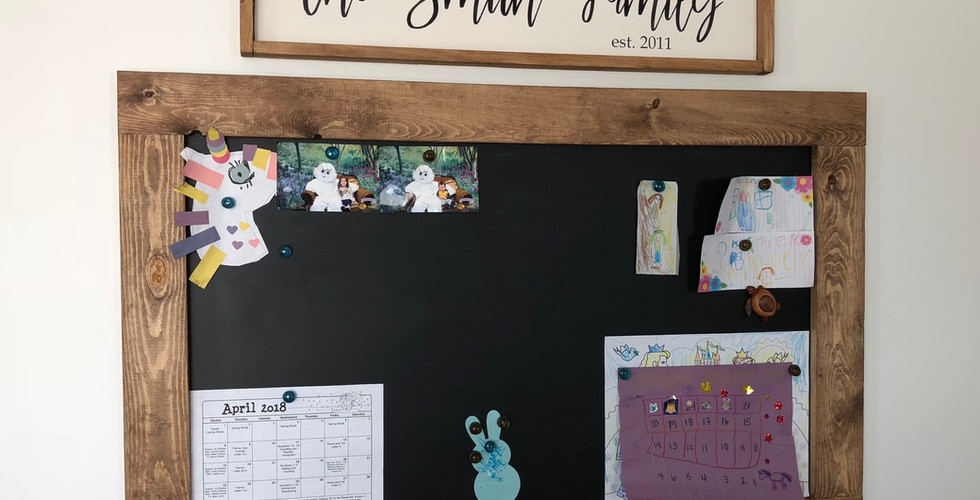
This is a quick tutorial on how to make this awesome large chalkboard in your home! Its super easy and quick and will make a huge impact on your organization game and add a little decor pop!

So, I had a friend approach me with a few decor questions. She is getting a new house and her mind was in decor mode (my favorite mode) and she wanted to get a magnetic chalkboard. She was able to find quite a few chalkboards and magnetic boards but very few that were both. She wasn't able to find the size she wanted either without paying an arm and a leg. We put our heads together and came up with this awesome combo piece. Its extra large too at close to 4 ft tall and nearly 2 ft wide. I love how it turned out and decided to make a quick tutorial for you so you can do it too! Its super easy and fun to make!
OK Materials list! I would like to note that I am not affiliated with any of these brands, its just what I used for my DIY Project!

-You will need a piece of sheet metal like this that you can pick up at your local hardware store. I found this one at lowes.com
-You will need some wood stain in your favorite color, I used Minwax Special Walnut.

-Then you will need some chalkboard paint like this a roller and paint tray.

-Then you will need some regular 1x4x8 inch furring strips or white wood boards (or any wood you love). You will need a miter saw or you can have your hardware store cut these to the sizes you need.
- Some gorilla glue https://www.lowes.com/pd/GORILLA-GLUE-18-fl-oz-Polyurethane-Multipurpose-Adhesive/1101533

- And lastly, self tapping metal screws like this. They will cut through the metal and attach the sheet metal to the wood frame.
First thing you want to do is cut out your frame with your wood. I usually cut the length first and lay them out on the metal to determine the width of your other two boards. Cut those and lay it out to make sure it works. You will want your frame to be a few inches wider and taller than the metal to hide the metal from the edge.

If you have a pocket hole jig use that to attach the frame together like this.
I use a Kreg Jig http://kregjig.com/
Otherwise you can use some metal L brackets to secure the frame together, and then stain and set aside to dry.

Next, put your first coat of chalk paint onto your sheet metal. It took a total of 3 coats for this project but make sure you let each coat fully dry according to the product description before adding the next coat.
Then you can take the gorilla glue and clue the metal to the frame and immediately screw into place with you metal screws. If they are self drilling like above you will not need to drill pilot holes they should go right thew the metal. Give it a few hours to fully cure before attempting to move it.
THATS IT!! YOURE DONE! Now you get to hang it up and begin using it. I have found that with chalkboard paint you want to take a piece of chalk and rub all over the board first thing. This is called "seasoning" the board. It some how allows for chalk to be erased more fully. Have fun! Hope you loved this tutorial.
You can see how massive this chalkboard was - its touching my light switch lol. You can find more tutorials on my YouTube channel
and Instagram
THANKS - Brandi :)


Brandi! This looks amazing! I would’ve never thought to make it myself. This size retails $100+! This will definitely be my first small project. I’ll keep you posted once I start and finish. We just moved into our brand new home last August and I’m very handy around the house. But, I held off on woodworking until we bought our own place and had space for tools. Now I’m ready to get started! Already have safety PPE, so I’m proceeding to buy my miter saw and a few other woodworking tools next month. lol but this Arizona heat might require for me to buy a shop fan first because 116 degree weather can really heat up our garage.